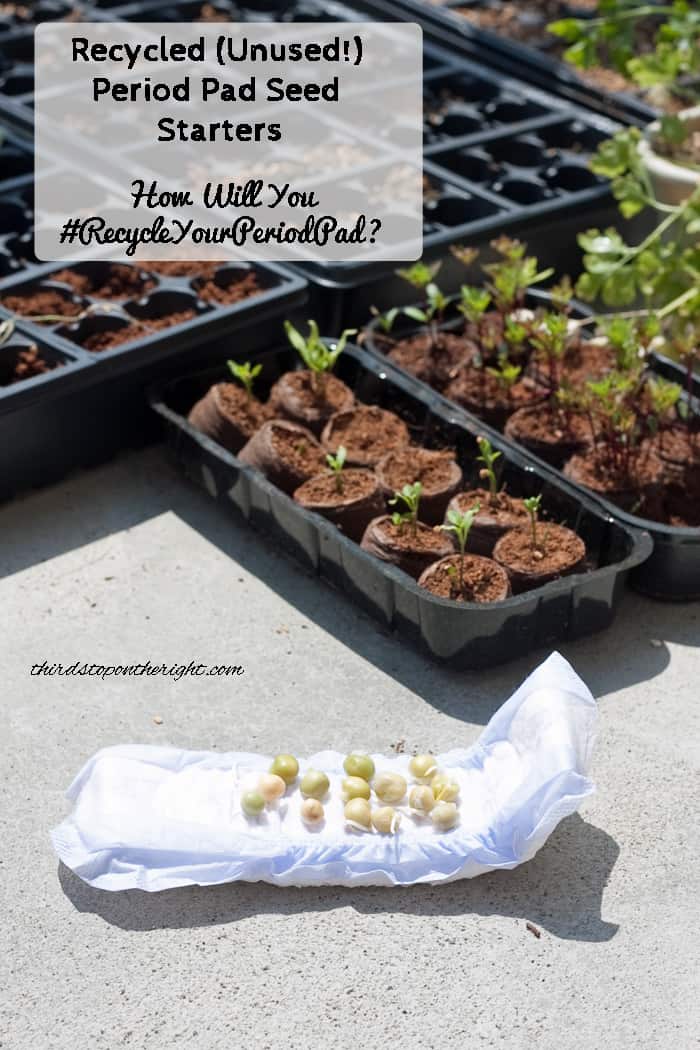

Now that it is October I am in full Halloween decorating mode. Ever since I can remember, even when I was quite young, I loved decorating for Halloween — the scarier the better. Now that I have a 2 year old who is easily scared I found I need to tone down some of the decorations. My skeletons, vampires, and other ghouls have to step aside for a few years until the kids are old enough to realize it is all just pretend.
In the meantime, I haven’t wanted to go completely smiley Jack-O-Lanterns and happy ghosts. Just nothing that will have me getting up all night to soothe the kids when they have bad dreams, but something that is a nod to Halloween’s scary side. That’s when I set out to make a spooky Halloween tree for our front windows.
How to Make a Spooky Halloween Tree from a Wine Bottle
 To do this craft at home you will need a few supplies. I was able to buy everything, except for the wine bottle, at Michael’s.
- Wine bottle (one of the larger ones is best as it will give you more of a base to support the tree)
- Black Spray Paint
- Spray Glitter
- Orange or Purple strand lights
- Halloween floral pieces (you can pick these up in the floral section with the wreath or flower arrangement supplies)

The first step is to spray paint the wine bottle. I chose a flat black spray paint as I felt it make the bottle look a little more ominous. It should only take a coat or two to cover the bottle. After the black spray paint dried, I sprayed on a thin layer of glitter — just because I think everything looks better with glitter 😉

Now, this next part is optional depending on how daring you are. I hate the look of cords. The thought of the cord to the lights sticking out of the top of the bottle really annoyed me. This is why I decided to drill a hole in the back of the wine bottle and thread the lights up through. Since you want the lights to come out the top of the bottle instead of staying contained inside, I recommend using a piece of wire to hook the first light on the strand on to in order to pull the lights through.
I am not going to get into how to go about drilling a hole in a wine bottle, but if you want more information on that you can check out my DIY Wine Bottle Nightlight post for instructions on how to go about making the hole.

I should also note that while I bought the foliage that I used in the bottle you can also make your own. If you have some dead tree branches in your yard, you can spray paint them black or dark purple and spray glitter on them to get the same effect as the store bought ones.
After you have arranged the foliage (I chose black leaves and glittery sticks but you can choose whatever you like) in the bottle you will want to begin weaving in the lights.

I will note that you don’t need a lot of lights so if you can find a small strand with maybe only 50 lights that should work well.

You will probably have some trial and error in getting the lights to look right in the tree. You want the light strands to intermingle with the sticks and leaves so they look like they are just part of the tree.

When you are done, you can place your ghostly tree in a window and turn out the lights for a spooky (but not too scary!) Halloween decoration!